The language of the user interface is changing:
1. Select Menu on the right of the screen, or click on your name where it appears.
 2. On a wide screen device from the menu choose “Display Language: English”.
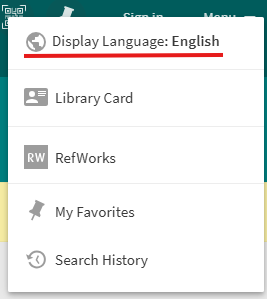
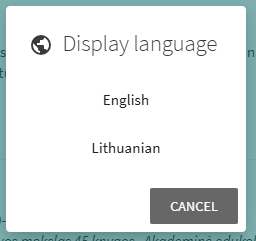
3. Select the language you need from the list of languages.
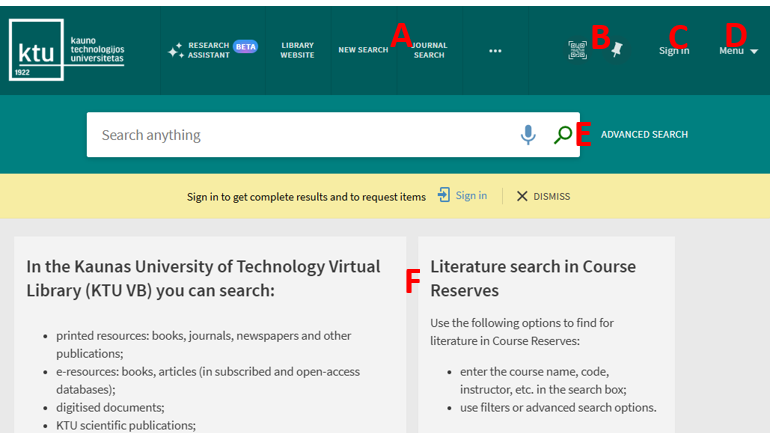
The new user interface has the following key elements:
A. The main menu.
B. The links to copy the current page link (by pressing the corresponding key for scanning QR code with your device) and Favorites (a Search history link is moved to the additional user services menu).
C. The Sign In link.
D. The link to additional user services (currently selected UI language is shown as an icon).
E. The search bar.
F. Static information fields.
You can search very easily in KTU Virtual Library. Just type one or more search words and click the “Search” button (a magnifying glass image on the right from search words). If you enter multiple words, KTU Virtual Library will return results that contain all of the specified terms. When searching by entering ISBN and ISSN values are searched with or without hyphens. If you are not getting expected results with hyphens, please try your search again without hyphens.
Searching for an Exact Phrase
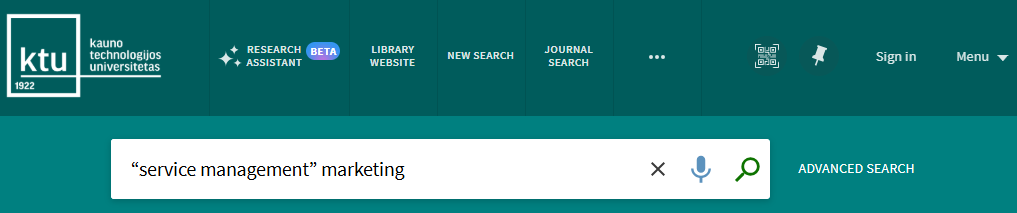
To search for an exact phrase (words next to each other and in exact order) type quotation marks around the phrase. For example, to search for “service management” as one term, type the following in the search box:
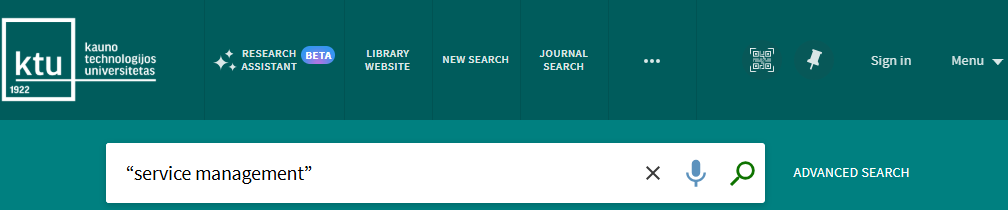
You can combine both words and phrases in your search. For example “service management” marketing will perform a combined search.
Searching for Any Specified Words
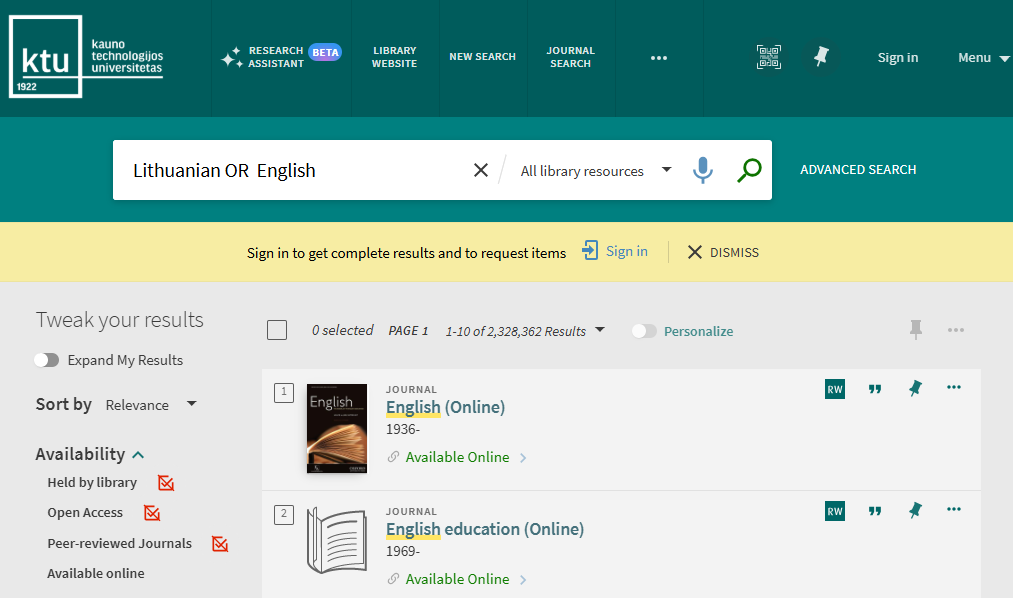
If you want to find resources that contain at least one search word entered in the search box, you must use the Boolean (logical) operator OR. Logical operators should be written in all capital letters – system otherwise it is treated as a simple word search.
For example, to search for items with the word Lithuanian or the word English, type the following in the search box:
Refining Search Results by Excluding Words or Phrases
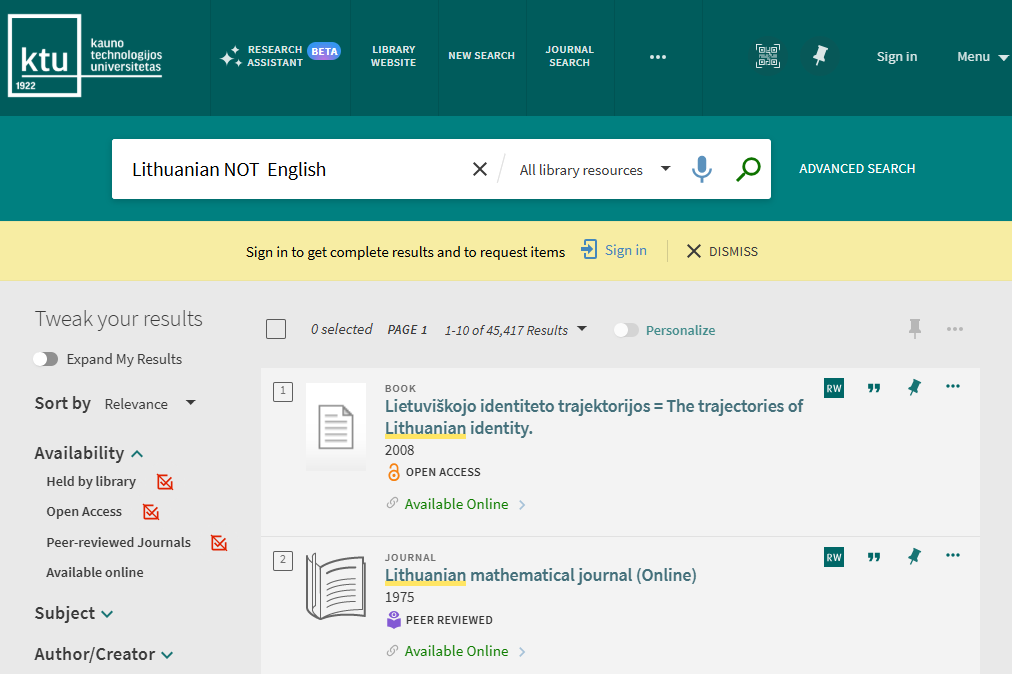
Search results may be refined by typing in the search box condition NOT and then type the word to exclude.
For example, to search for items with the word Lithuanian but not the word English, type the fol-lowing in the search box:
You can combine OR, AND, NOT logical search operators. Such searches can be grouped with parentheses. If the parentheses are not used, the NOT operator must be used last. For example: Lithuanian AND English NOT Russian. If it is necessary to place the NOT operator elsewhere, make sure that you enclose the operation with parentheses. For example: (Lithuanian NOT Russian) AND English.
Using Wildcard Characters in Search
Wildcard characters ? and * can be used in the middle or at the end of search words. The Wildcard character entered at the beginning of the search word will be ignored.
? – enter a question mark to perform a single character wildcard search. For example, type wom?n to search for records that contain the strings woman, women, and so forth.
* – enter an asterisk to perform a multiple character wildcard search. For example, type cultur* to search for records that contain strings, such as culture, cultural and culturally.
Grouping Search Terms
You can use parentheses to group terms to clarify the order when searching for more than one type of logical operator.
For example, when searching for records that contain Shakespeare and either tragedy or sonnet the search query should be written as Shakespeare AND (tragedy OR sonnet). If no parentheses are specified in the above query, Primo will instead group the words as follows: (Shakespeare AND tragedy) OR sonnet and will search for Shakespeare tragedies and any sonnet.
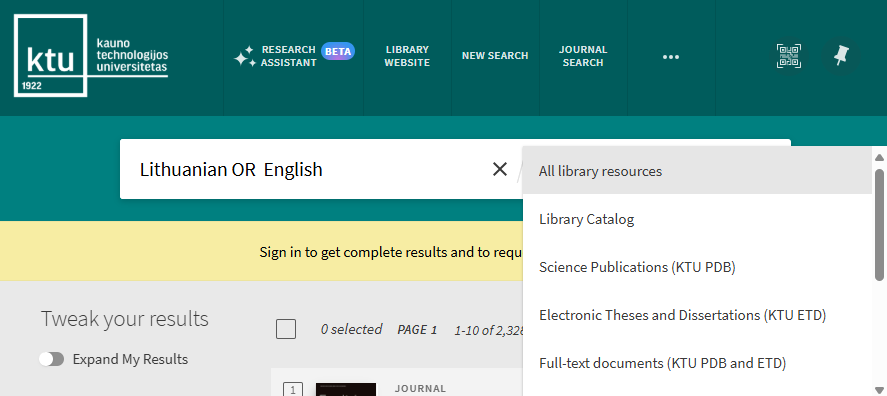
Searching in the Selected Search Scope
The search scope defines where the system should perform the search. The default search scope is the first one listed in your institution’s virtual library search scope list. The “All library resources” are “All library resources”, which comprise all the library’s local (local) and remote subscribed and/or freely available resources. The desired search resource can be selected from the list in the search bar.
Search Limitations
The system will display a message and provide suggestions when the following limits are exceeded:
The Advanced Search allows you to specify additional lines of criteria, specify filters prior to executing the query, combine queries with logical operators.

The Advanced Search page contains the following components and options:
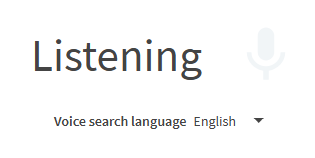
This enhancement allows users to enter search terms using their device’s microphone. After selecting the Microphone icon, users can begin speaking search terms or select a different language for the system to detect. If no input is detected for 10 seconds, the system will provide a message and then prompt the user to provide audio input two more times before timing out and exiting the voice search assistant. If audio is detected, system will display the relevant search results.

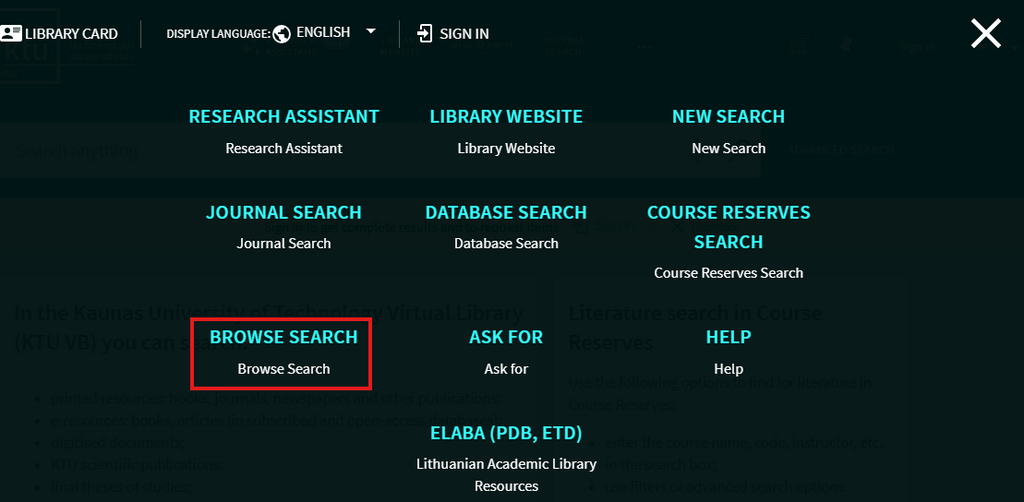
In order to use The Browse search, click “Browse Search” in the main menu. This search allows you to browse library local material (local material only in order to find information of relevance quickly by author, title, subject. Just click on result.

Why Everyone Should Sign In?
When you sign into KTU Virtual Library, you are able to do the following:
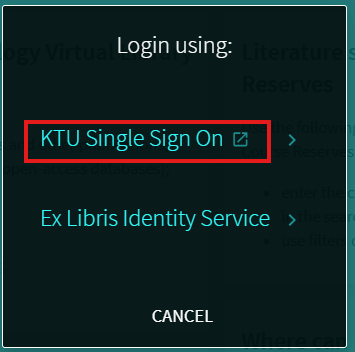
How to Sign In?

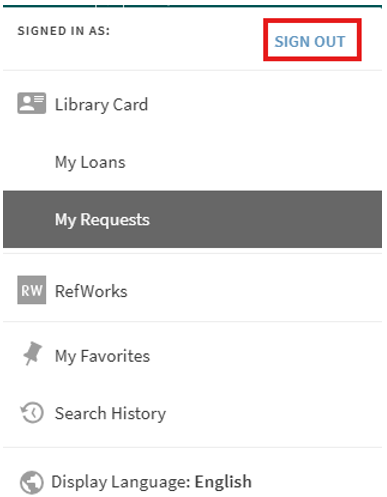
Why Everyone Should Log Out?
To keep your personal data safe, do not forget to log out:
My Library Card
With the “My Library Card” feature, you can extend the deadlines for loan items, cancel your loans, read messages the library staff posted to you, change your personal settings.
“My Library Card” is accessible by clicking the Sign-In area in the upper right corner of the screen and choosing “My Library Card” in the expanded menu.
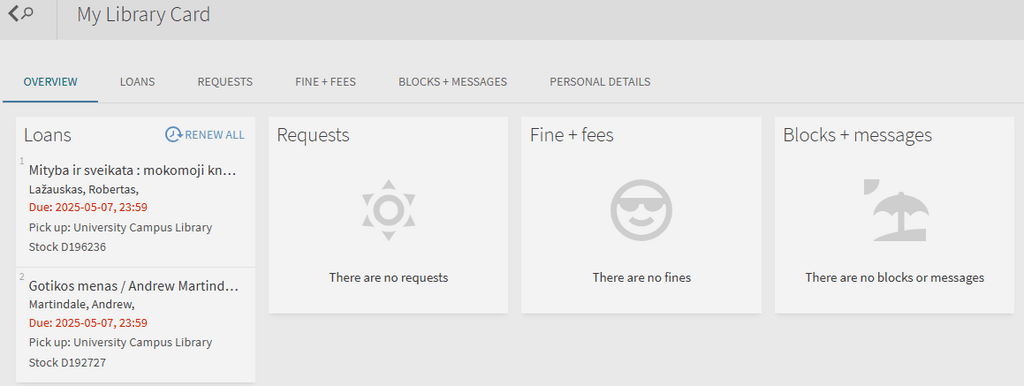
Logged in users in “My Library Card” will find:
The My Favorites page, which is accessed by clicking the My Favorites button “Pin” at the top of each page.
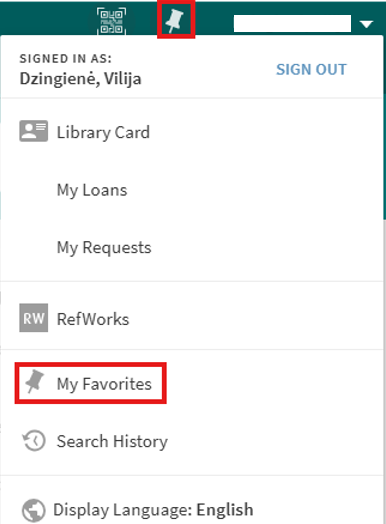
The My Favorites contains of:
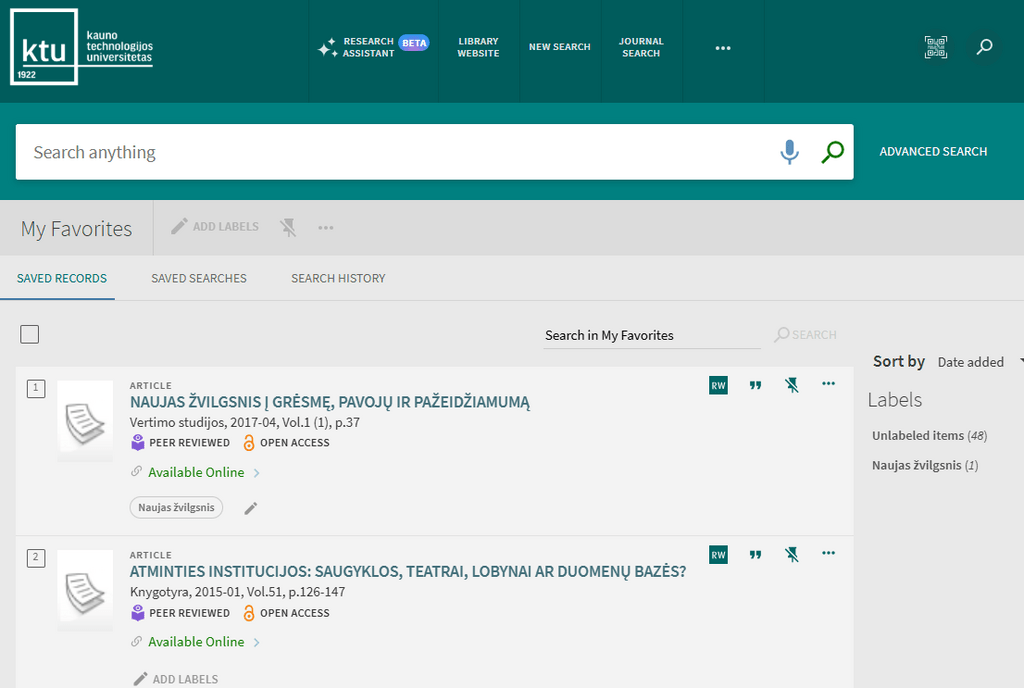
Saving and Managing Records
Signed-in users are able to save found records for subsequent sessions. After a record has been saved, the “My Favorites > Saved Records” page allows users to perform the following operations on saved records: view, delete, and label. Labels allow you to group and manage similar records.
To save a single record:
To save multiple records:
Note! The number of selections is limited to a maximum of 50 items at a time. If this limit is reached, users are prompted to edit their selections.
To remove an individual item from the list you can click the “Unpin” button next to the item either in the search results or on the “My Favorites > Saved Records” tab. For removing multiple items at the same time you can select needed items on the “My Favorites > Saved Records” tab and click “Remove this items”.
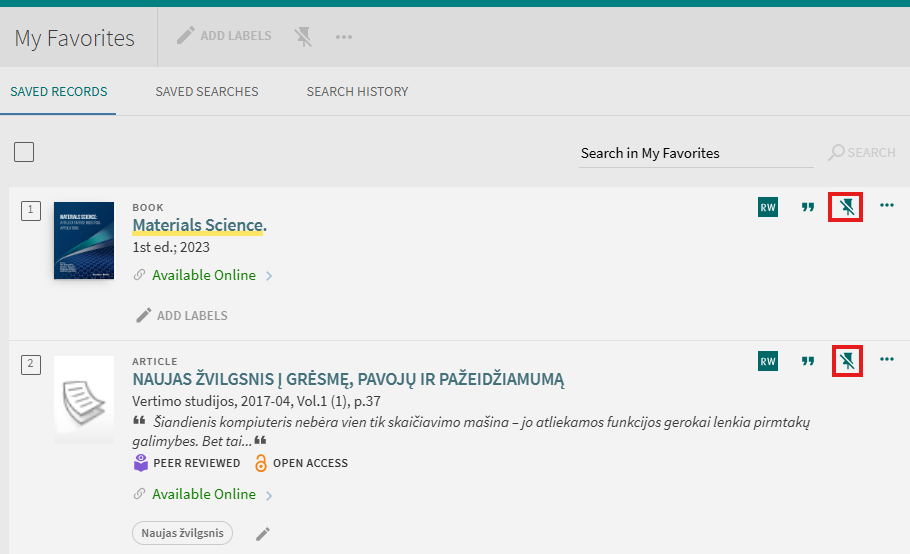
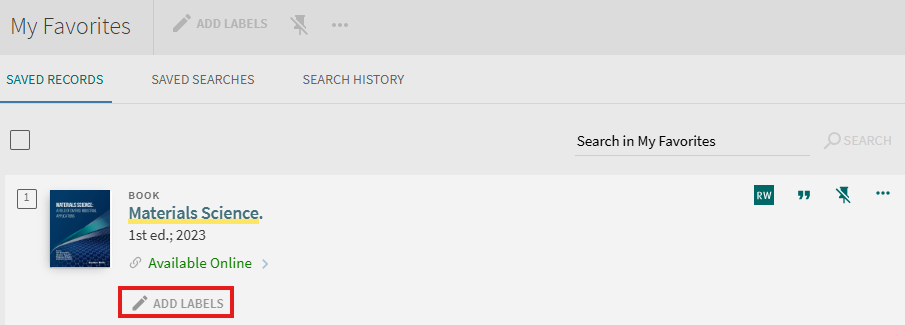
Adding Labels to a Record
By adding labels to your records, you can then group them into the private lists. One record can have multiple labels if you want to include that record in multiple lists.
To assign labels to a record:
To remove a label:
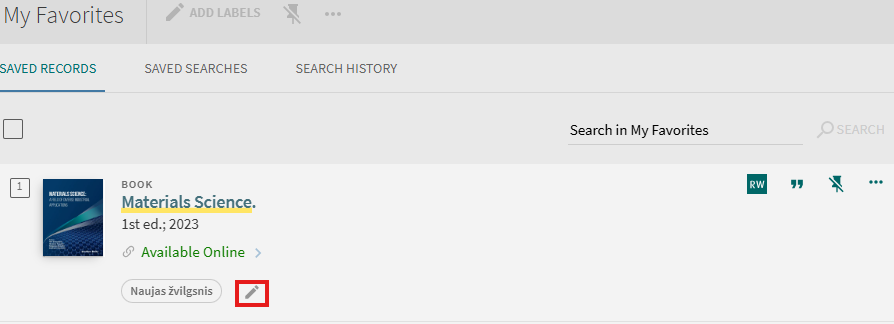
To view records grouped by a label:
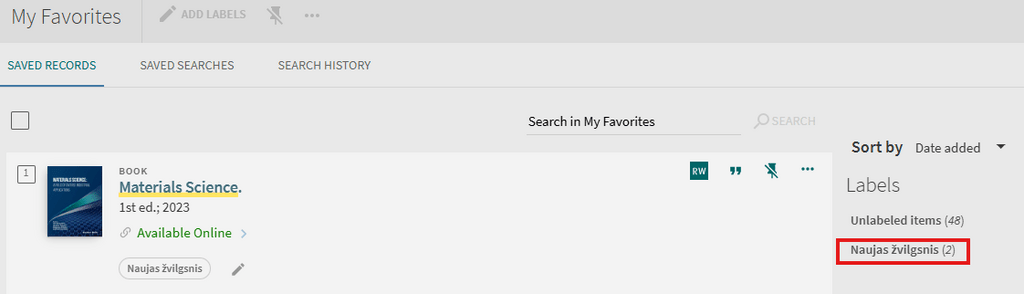
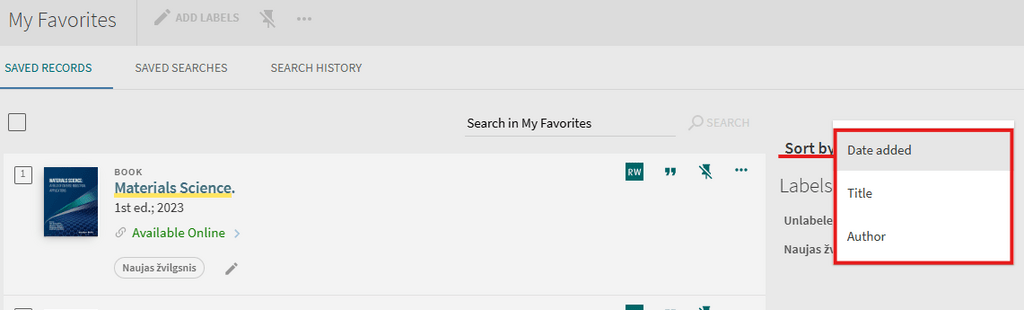
Sorting the list of Saved Records:
Saving Searches and Managing Saved Searches
Signed-in users are allowed to save searches between sessions and receive email alerts when there is an update to the saved search query.
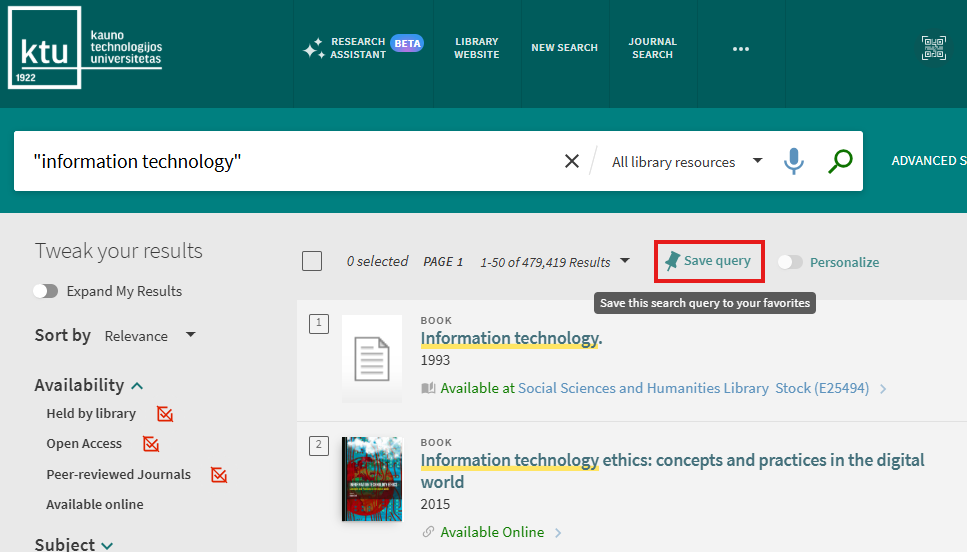
Saving a Search query:
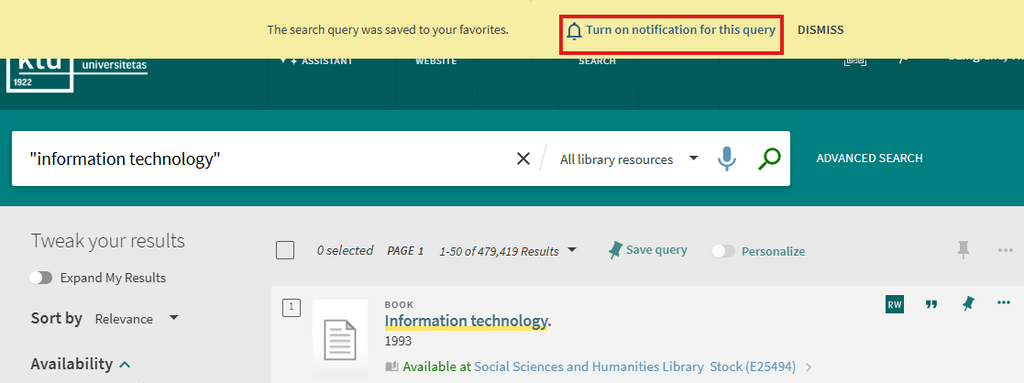
In addition, you will have an opportunity to set an alert for this query by clicking the notification link that after saving a query.
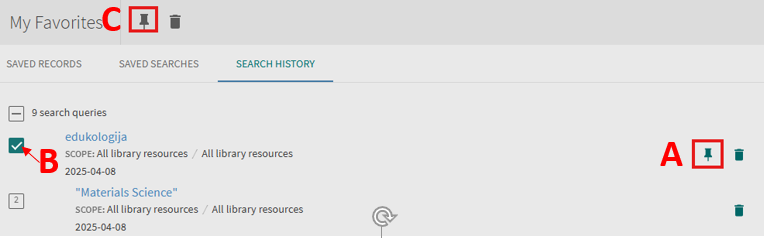
To save a query from the Search History:
To delete a group of queries:
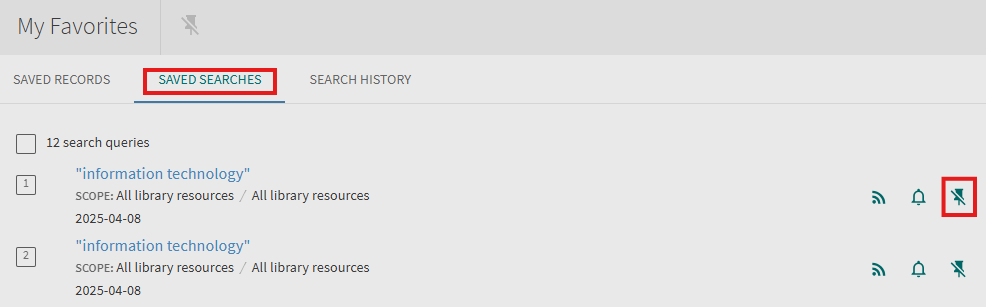
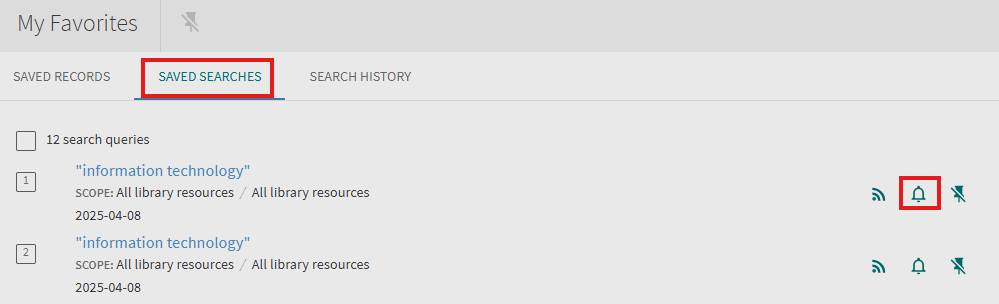
Managing Alerts
Signed-in users are allowed to receive email alerts when there is an update to the saved search query. After an alert has been set, the My Favorites > Saved Searches page allows users to perform the following operations on alerts: set/clear an alert and update email addresses.
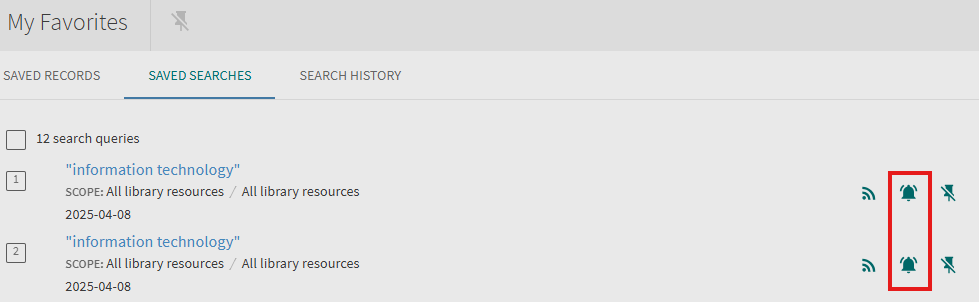
To set an alert:
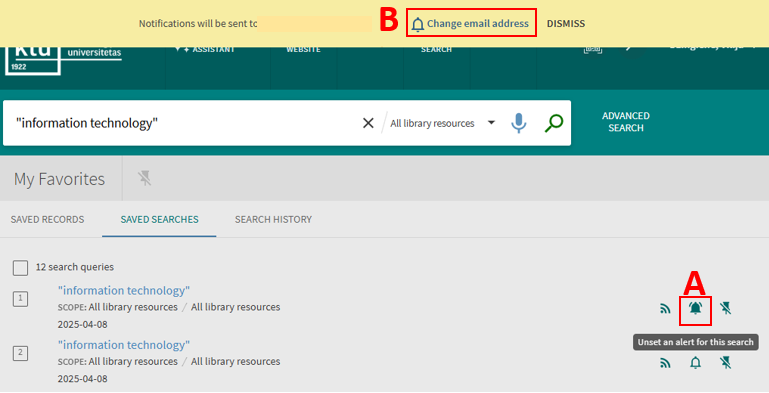
Attention! Changing the email address to a different than provided by your institution does not guarantee successful delivery of the messages.
To clear an alert:
Activating an RSS Feed
The Rich Site Summary (RSS) functionality allows signed-in users to be informed of changes to results in their saved searches.
Enabling RSS for a saved search:
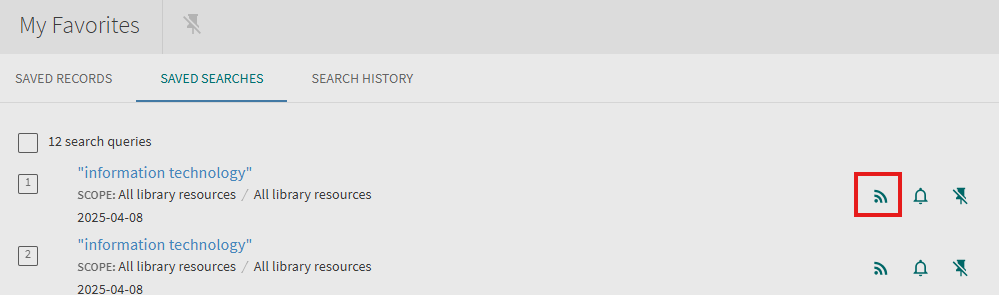
Attention! Subscribe to the feed only if your browser or device has an RSS reader.
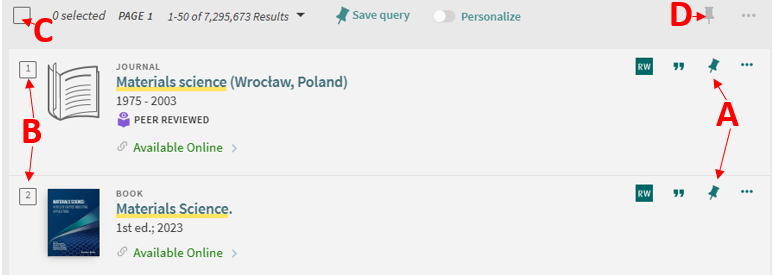
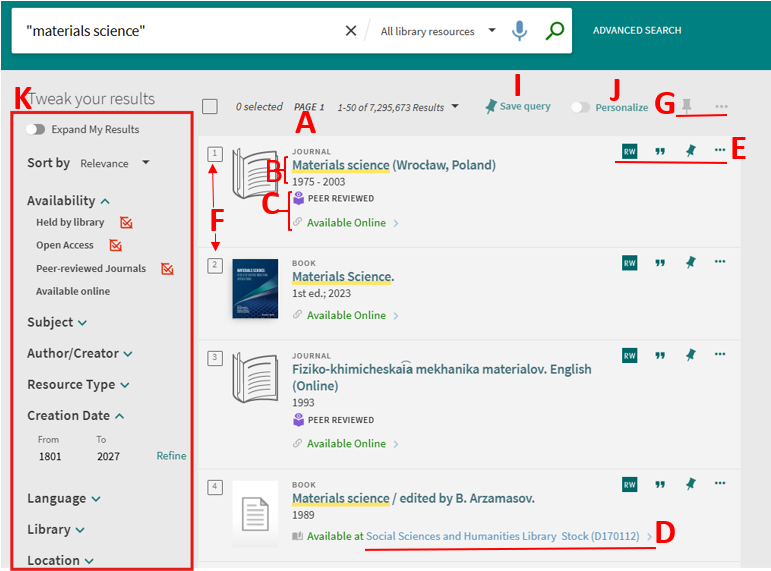
The Brief Results page display all the items that match your search query. For each item, the following information displays:
A. Resource Type – the format of the item, such as book, article, journal, and so forth.
B. Brief record – the brief record of the item shows main metadata such as the title, author and other information. By clicking it you’ll navigate to the detailed record.
C. Access terms on the internet – known access terms and other data for the item. Link to access the item on the internet.
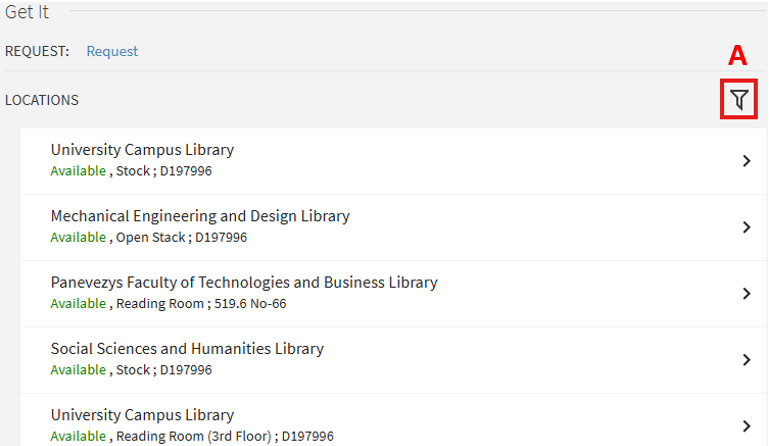
D. Availability status – the best in library location is calculated and shown. By clicking it you’ll be able to request the item.
E. Send to actions – the Send To actions allow you to perform actions on the item (such as emailing the item, creating a citation for the item, and so forth).
F. Item number in the result’s list and the Individual Selection box – select the check box that appears next to each item in the list. As records are added to the page, the number of selected records appears above the results. You can load more results to the page to allow the selection of more records.
G. Applying Actions in Bulk – after you have selected one or more items, select the Actions link that appears above the list of results to display the available export actions. Selecting an export action, will apply that action to all selected records..
I. Save query – Click to save current search query to your favorites. Read more Using My Favorites > Saving Searches and Managing Saved Searches.
J. Personalize / Individualize – personalized ranking in Central Discovery Index search resul adjusts the ranking algorithm to the general discipline of the user.
K. Tweak my results – the facets on the right side of the page allow you to filter your results by categories (such resource type and date) and to specify a type of sort. The facets are generated from the top 10 000 records by using specialized record data. Next to the facet value you will see (if applicable) the count of records that can be filtered by using that facet value. Read more Filtering the Results.
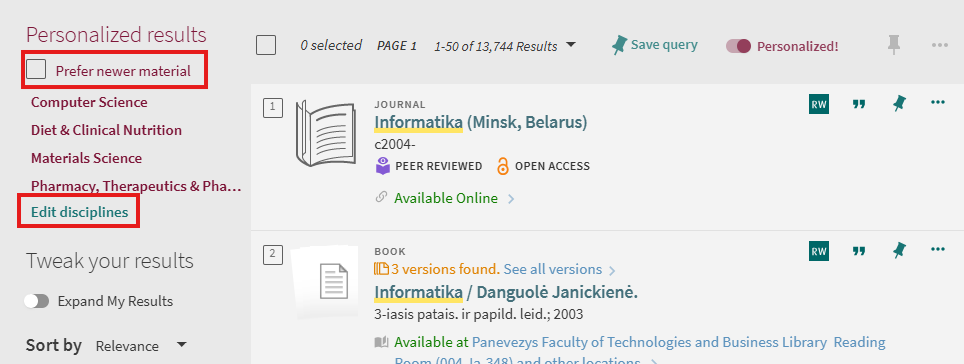
Personalization of Search Results
Personalized ranking in Central Discovery Index is particularly helpful for ambiguous searches, where search results come from a variety of disciplines or include a large set of articles. It does not replace topic facets or act as a filter. It simply adjusts the ranking algorithm to the general discipline of the user.
Although the user will see the Personalized filter for all searches when any personalized ranking options are selected, it applies only to Central Discovery Index results and will not affect results found in Primo local (Library catalogues), other remote searches.
To enable personalized settings:

To edit personalized settings:
The Tweak your results section, which appear on the left side of the Brief Results page, contains a list of categories, which are referred to as facets. By including and excluding these facets (such as date, author, record type, and so forth), you can narrow the search results to get the results you are seeking.
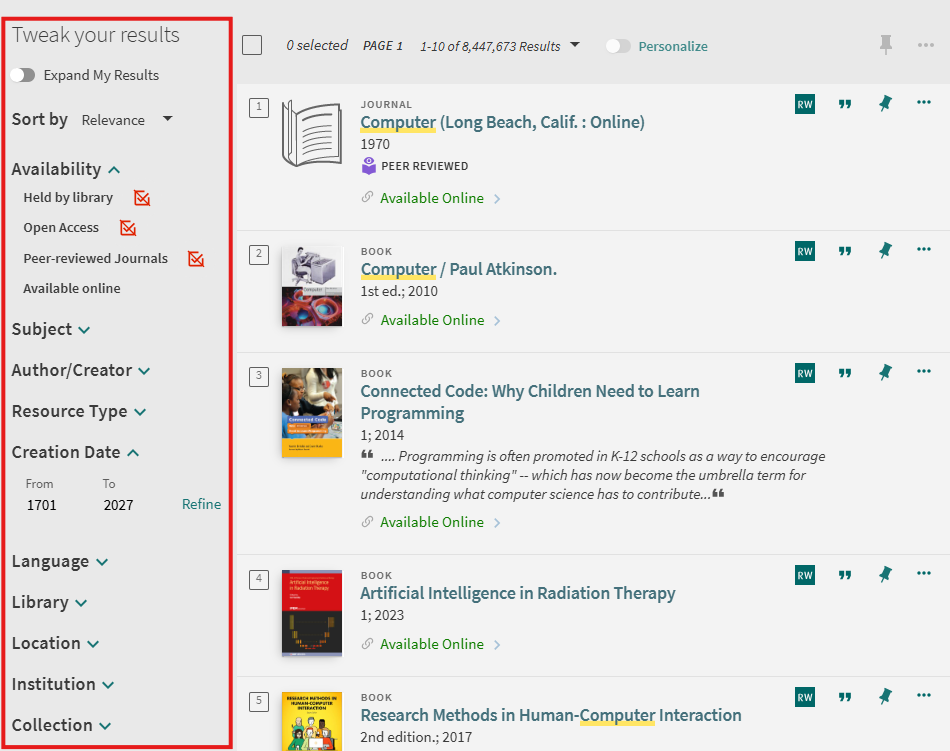
To include / exclude facets:
Persistent Facets
When performing many similar types of searches, you may want to retain your filters for subsequent searches within a session.
To make a facet persistent, hover the cursor over the facet in the Active filters section and then click the facet’s padlock button.
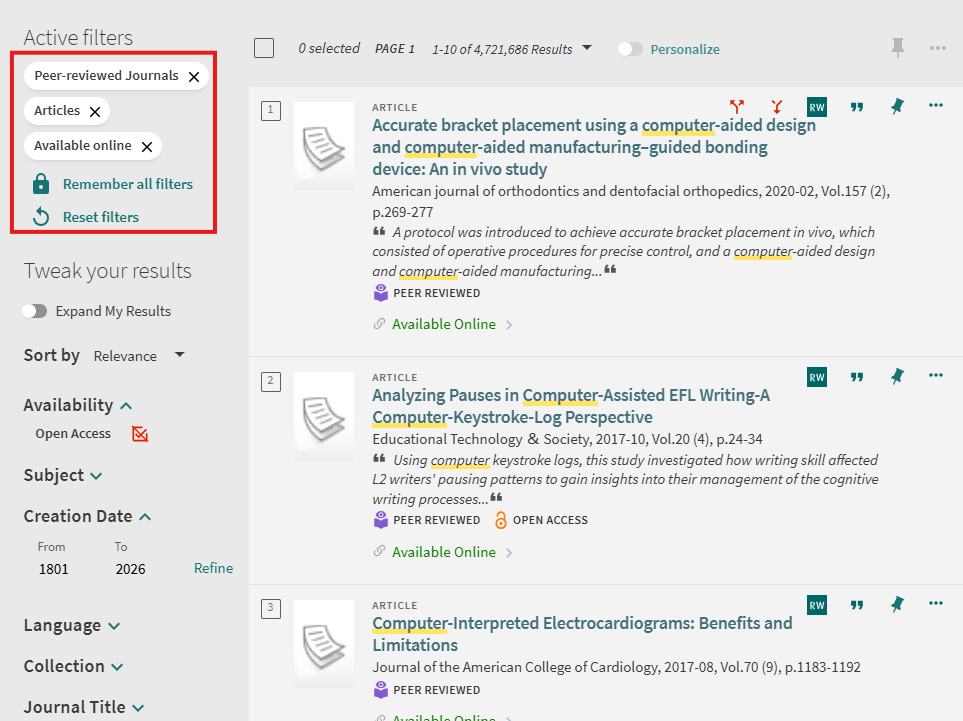
To remove a filter’s persistence, click the facet’s “Reset filters” button or delete the facet.
After selecting an item in the Brief Results, the record’s Full Display opens to display additional information. Users can either scroll to a particular section or use the links shown on the left side of the page.
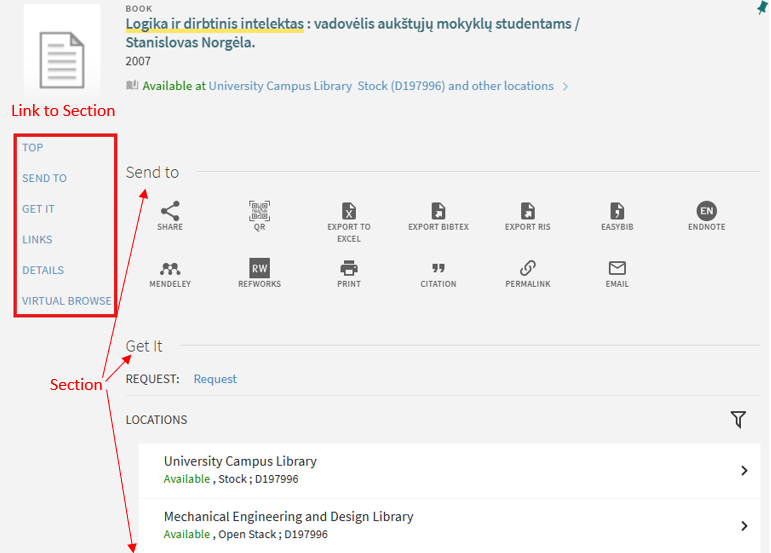
The item’s information is organized by the following sections:
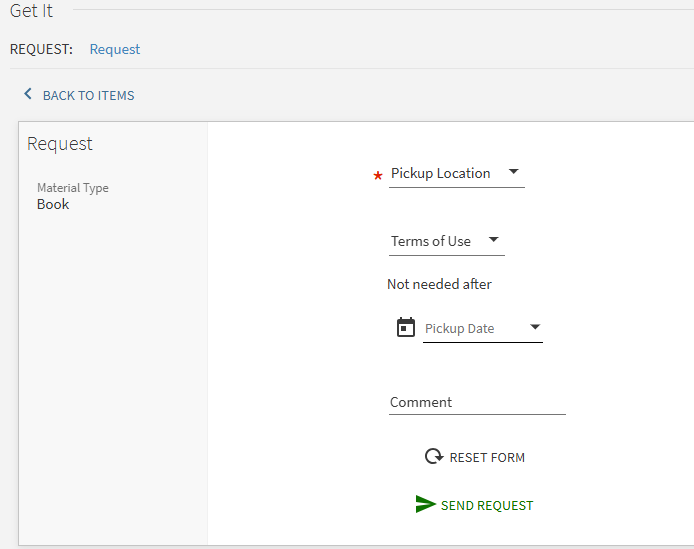
Only signed-in users are allowed to place hold requests.
To place a hold request:
4. Choose free item and click “Request” button.
To cancel a hold request:
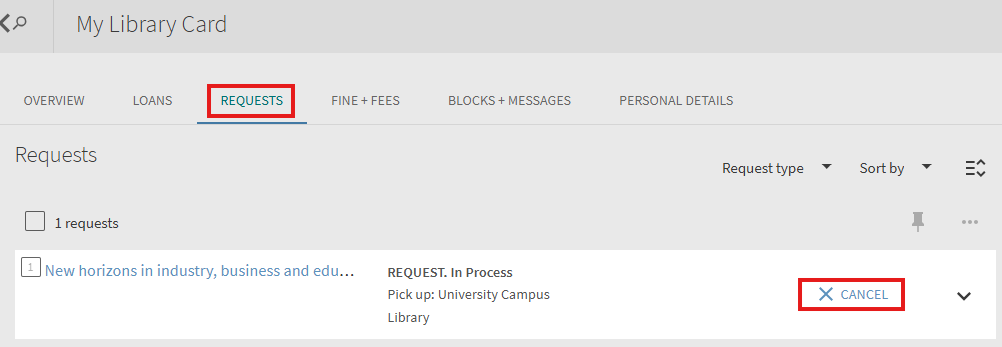
Signed in user can see his active loans, previous and historic loans and renew active loan. Loan list can be accessed from user space My Library Card (My Account) section Loans.
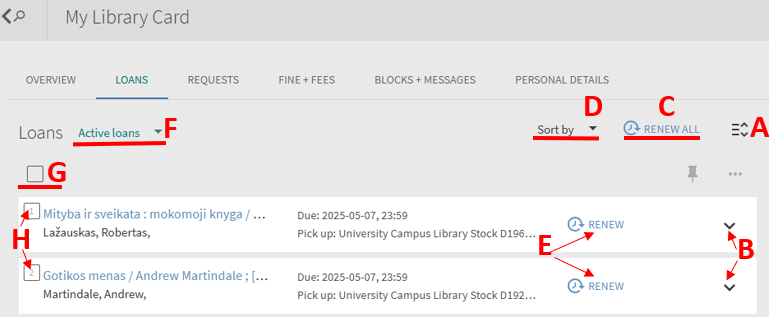
In Loans list user can:
A. Click to show detailed information for the all loans.
B. Click to show detailed information for the selected loan.
C. Click to renew all loans. The individual terms for renewal of each loan will be evaluated. If any loans was selected by function H the button will change to Renew Selected.
D. Click to choose loans list order method.
E. Click Renew to renew the selected loan. The items that cannot be renewed on the Loans tab will be marked Not Renewable icon.
F. Click to switch between Active loans and Previous and historic loans.
G. Click field to select all items in the Loans list.
H. Click the number field to add loan to the selection list.
Note! Loans with near due time and overdue loans are marked with additional icons and text.


